
new construction walk through checklist pdf
This checklist is essential for ensuring new constructions meet quality standards, covering all key areas from exterior to interior, helping buyers and builders achieve a smooth handover․
1․1 Importance of a Walk Through Checklist
A walk-through checklist is crucial for ensuring a new construction meets quality and functionality standards․ It helps identify potential issues before finalizing the purchase, ensuring everything is in perfect condition․ This detailed guide covers exterior and interior inspections, including structural integrity, systems like HVAC and plumbing, and safety features․ By systematically evaluating each component, buyers can address defects and ensure all fixtures and appliances are functional․ The checklist also serves as a learning tool, familiarizing homeowners with maintenance responsibilities․ It provides a clear record of the property’s condition, facilitating a smooth transition and protecting the buyer’s investment․ A thorough walkthrough is essential for a stress-free homeownership experience․
1․2 Benefits of Using a Detailed Checklist
A detailed walk-through checklist is a powerful tool for ensuring a thorough evaluation of a new construction property․ It helps buyers identify potential issues early, preventing costly repairs down the line․ By systematically reviewing each component, from structural integrity to finishes, buyers can ensure the property meets their expectations․ A checklist also serves as a comprehensive guide, covering essential systems like HVAC, plumbing, and electrical, as well as safety features and appliances․ It provides a clear record of the property’s condition, which can be shared with the builder for necessary corrections․ This process not only ensures accountability but also acts as a learning tool, helping homeowners understand maintenance responsibilities․ Ultimately, a detailed checklist fosters a smooth transition and peace of mind for new homeowners․
1․3 How to Prepare for the Walk Through
Preparing for a new construction walk-through involves several key steps to ensure a thorough inspection․ Start by scheduling the walkthrough during daylight to maximize visibility․ Gather essential tools like a detailed checklist, flashlight, camera, and measuring tape for accurate assessments․ Review the property’s plans and specifications to understand its layout and systems․ Familiarize yourself with the checklist categories, such as exterior, interior, and systems, to stay organized․ Consider bringing a professional, like a home inspector, for expert insights․ Consider testing systems like plumbing and electrical during the walkthrough․ Finally, review warranties and maintenance responsibilities to understand your obligations as a homeowner․
Property Details and Orientation
Document property address, date, and time of walkthrough․ Review orientation details, noting layout, initial impressions, and overall condition to ensure alignment with construction plans and expectations․
2․1 Property Information and Address
Start by documenting the property’s full address, including street name, number, city, state, and ZIP code․ Note the lot number and subdivision, if applicable․ Verify the property’s location matches the legal description and ensure all details are accurately recorded․ This step ensures clarity and prevents future disputes․ Include any additional identifiers, such as community name or tax parcel number; Check for visible street access and confirm the property’s orientation․ Document neighboring properties and any shared boundaries․ Ensure utilities like water, electricity, and sewage are correctly assigned․ Note any easements or rights of way․ This information is crucial for legal and maintenance purposes, ensuring everything aligns with the property’s records and plans․
2․2 Date and Time of Walk Through
Record the exact date and time of the walk-through to ensure clarity and accountability․ This step helps verify that the inspection aligns with the builder’s schedule and provides a reference point for future maintenance or repairs․ Note the weather conditions if they could impact the inspection, such as rain affecting the roof or gutter evaluation․ Ensure all parties involved are present or informed, including the builder, buyer, and any representatives․ This documentation serves as a formal record of the inspection’s occurrence and is essential for warranty purposes․ If issues are identified, they should be noted alongside the date and time for follow-up actions with the builder․
2․3 Orientation and Initial Impression
Begin the walk-through with an orientation of the property to understand its layout and key features․ This step helps set expectations and familiarizes the buyer with the home’s design․ Assess the overall first impression, noting the condition of the exterior and entryway․ Check for any visible damage, dirt, or irregularities that may indicate issues․ Ensure all amenities and features are accounted for, such as landscaping, outdoor structures, and additional components specified in the purchase agreement․ This initial assessment provides a baseline for the detailed inspection to follow, ensuring no major discrepancies are overlooked․ A positive first impression can enhance the buyer’s confidence in the property’s quality and condition․

Exterior Inspection
Check the foundation, walls, roof, gutters, and exterior fixtures for cracks, damage, or improper installation․ Ensure all components are functional and properly sealed for durability and safety․
3․1 Foundation and Structural Integrity
The foundation is critical to the stability of the property․ Inspect for cracks, unevenness, or signs of settling in walls, floors, and slabs․ Check for water damage or stains, which may indicate drainage issues․ Ensure all structural components, such as beams and piers, are secure and properly aligned․ Verify that the foundation meets local building codes and standards․ Look for any gaps or shifts in the foundation that could compromise structural integrity․ Addressing these issues early prevents costly repairs later․ A stable foundation ensures safety and longevity of the property, making it a priority during the exterior inspection․
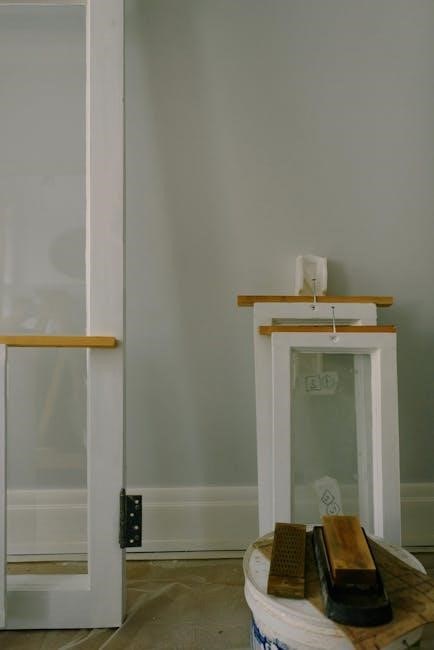
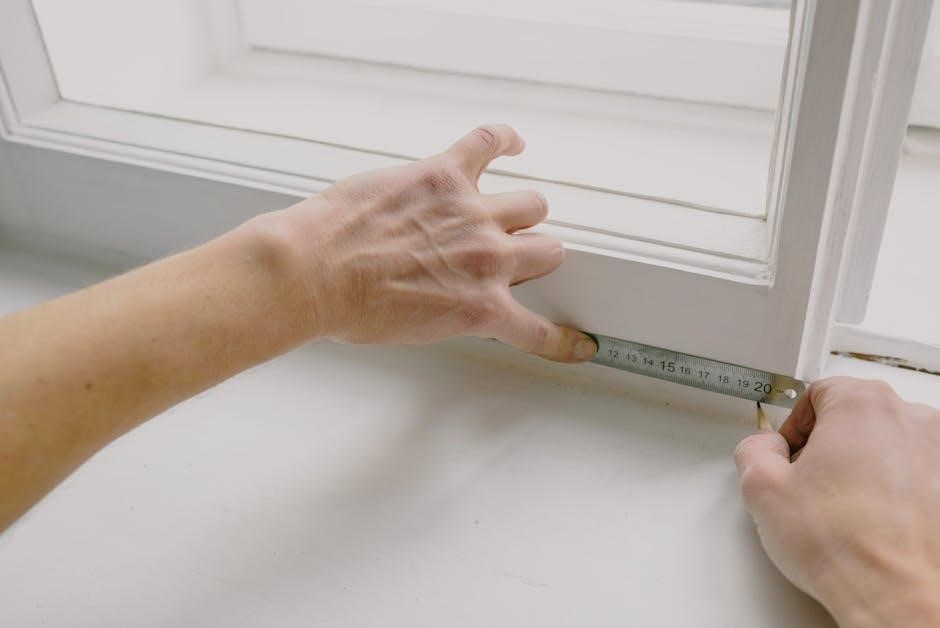
3․2 Walls, Windows, and Doors
Examine walls for cracks, uneven surfaces, or damage․ Ensure paint and finishes are evenly applied․ Check windows for proper installation, smooth operation, and intact seals․ Verify that doors open and close without binding, with proper alignment and latching․ Look for any gaps or damage around frames․ Test all door and window hardware, such as handles and locks, for functionality․ Ensure weatherstripping is in place to prevent air leaks․ These inspections ensure structural integrity, proper installation, and energy efficiency․ Addressing issues here prevents future problems, ensuring the home is secure and well-maintained․
3․3 Roof and Gutter System
Inspect the roof for damaged, missing, or loose shingles and ensure proper installation․ Check flashing around vents, skylights, and chimneys for gaps or damage․ Verify gutters and downspouts are securely attached and free of debris․ Ensure water flows properly through downspouts and directs away from the foundation․ Examine fascia and soffit for damage or rot․ Look for signs of sagging or unevenness in the roofline․ Test gutters by flushing with water to ensure they function correctly․ Addressing these issues ensures the roof and gutter system performs effectively, preventing water damage and maintaining the home’s structural integrity․ Early detection of problems saves time and money in the long run․

Interior Inspection
Inspect walls, ceilings, and floors for damage or defects․ Check doors, windows, and trim for proper installation and alignment․ Ensure all interior elements meet quality standards․
4․1 Walls, Ceilings, and Floors
During the interior inspection, carefully examine walls, ceilings, and floors for any cracks, damages, or uneven surfaces․ Ensure all surfaces are smooth and properly finished․ Check for any water stains or signs of moisture damage․ Verify that walls are straight and plumb, and ceilings are level․ Inspect floors for proper installation, ensuring they are level and securely fastened․ Look for any gaps or unevenness between flooring and walls․ Check for paint quality and consistency, ensuring no streaks or uneven coverage․ Document any defects or issues for the builder to address․ This step ensures the interior spaces are structurally sound and visually appealing․
4․2 Doors and Windows
Inspect all doors and windows to ensure proper installation and functionality․ Check if doors open and close smoothly, and windows operate effortlessly․ Verify that all doors are properly aligned and securely attached to frames․ Look for any damage, dents, or scratches on surfaces․ Ensure all hardware, such as handles, locks, and hinges, is functioning correctly․ Test window seals for air tightness to prevent leaks․ Make sure screens are intact and properly fitted․ Check for any gaps between doors and frames or windows and sashes․ Document any issues like misalignment or sticking parts․ This step ensures all doors and windows are in excellent condition and ready for use․ Proper inspection helps identify potential issues before finalizing the purchase․
4․3 Trim and Molding
Inspect all trim and molding for proper installation and finish․ Check for any cracks, gaps, or unevenness in the woodwork․ Ensure all joints are securely fitted and smooth to the touch․ Verify that trim aligns perfectly with walls, ceilings, and floors․ Look for any signs of damage, such as dents or scratches, on the surfaces․ Confirm that the finish matches the specified design and color․ Test for any loose or detached pieces that may need reattachment․ Document any defects or areas requiring touch-ups․ This step ensures the trim and molding contribute to the overall aesthetic and structural integrity of the home․ Proper inspection guarantees a polished and durable finish․
Systems and Appliances
This section ensures all systems and appliances are functional and properly installed․ Inspect HVAC, plumbing, electrical, and kitchen/bathroom fixtures for any leaks or malfunctions․ Verify proper installation and operation of all appliances, including testing each feature․ Check for any damage or defects in components․ Ensure all warranties and manuals are provided․ Confirm that systems meet energy efficiency standards and safety regulations․ Document any issues requiring repair or adjustment․ This step ensures a smooth transition to homeownership with fully operational systems and appliances․
5․1 HVAC System Inspection
Inspect the heating, ventilation, and air conditioning (HVAC) system for proper installation and functionality․ Check for any leaks in ducts or connections․ Ensure the thermostat is calibrated correctly and operates smoothly․ Verify that all vents and registers are clear of blockages and function properly․ Test the system by running it through different modes (heat, cool, fan) to ensure consistent airflow․ Check for any unusual noises or vibrations․ Confirm that the system meets energy efficiency standards and is free of damage․ Review the HVAC manual and warranty provided by the builder․ Document any issues or malfunctions requiring attention․ Proper HVAC operation is crucial for comfort and energy efficiency in the home․
5․2 Plumbing and Fixtures
Examine all plumbing fixtures, including sinks, toilets, showers, and bathtubs, for proper installation and function․ Check for leaks under sinks, around faucets, and near water supply lines․ Test water pressure by running faucets and ensuring hot and cold water flow correctly․ Flush toilets to check for proper flushing and drainage․ Inspect pipes for visible damage or corrosion․ Verify that all drains are clear and functioning without clogs․ Ensure that water heaters are installed correctly and meet size requirements․ Check for any signs of water damage or mineral buildup․ Review the operation of garbage disposals and dishwashers if applicable․ Document any issues or needed repairs to ensure the plumbing system is fully functional and meets quality standards․
5․3 Electrical Systems and Outlets
Inspect all electrical systems and outlets to ensure proper installation and functionality․ Test each outlet by plugging in a device to confirm power․ Check circuit breakers or fuses for correct labeling and operation․ Inspect wiring for visible damage, fraying, or improper connections․ Verify that all light switches and fixtures are working correctly․ Ensure GFCI outlets are installed in bathrooms, kitchens, and outdoor areas, and test their functionality․ Check for adequate outlet distribution, including USB ports if applicable․ Review the electrical panel to ensure it is properly sized and configured for the home’s needs․ Document any flickering lights, warm outlets, or other issues․ Ensure all electrical components meet safety standards and are free from hazards․
5․4 Kitchen Appliances and Fixtures
Inspect all kitchen appliances and fixtures to ensure they are properly installed and functioning․ Check ovens, stoves, microwaves, dishwashers, and refrigerators for correct operation and any visible damage․ Verify that all appliances are securely connected to gas, water, and electrical systems․ Test lighting fixtures, range hoods, and exhaust fans to ensure they are working correctly․ Examine cabinets, countertops, and sinks for proper installation and alignment․ Check plumbing fixtures under the sink for leaks or water damage․ Ensure all hardware, such as knobs and handles, is securely attached․ Test garbage disposals and ice makers if applicable․ Document any issues or defects for the builder to address before final approval․
5․5 Bathroom Fixtures and Accessories
During the walkthrough, inspect all bathroom fixtures and accessories for proper installation and functionality․ Check sinks, showers, bathtubs, and toilets for leaks or water damage․ Ensure all faucets, showerheads, and handles are securely installed and functioning correctly․ Test the flushing mechanism of toilets and verify that all drains flow properly․ Inspect mirrors, lighting fixtures, and bathroom ventilation fans for correct operation․ Examine cabinetry, countertops, and tilework for any gaps, cracks, or uneven surfaces․ Check that towel bars, soap dispensers, and other accessories are securely mounted․ Document any defects or issues for the builder to address before final approval․ This ensures the bathroom meets quality and safety standards․

Safety Features
Inspect smoke and carbon monoxide detectors, fire extinguishers, emergency exits, safety rails, and staircases to ensure they meet safety standards and are fully functional․
6․1 Smoke and Carbon Monoxide Detectors
Ensure smoke and carbon monoxide detectors are installed in all required areas, such as bedrooms, hallways, and kitchens․ Test each detector to confirm proper function․ Verify that all devices are interconnected for whole-house alert systems․ Check for a silence button to test sensitivity and avoid false alarms․ Ensure detectors are free from dust and debris that might impair performance․ Confirm that all units are powered correctly, whether hardwired or battery-operated, and test backup power sources․ Verify that carbon monoxide detectors are placed near sleeping areas to detect potential leaks․ Ensure all devices meet local building codes and standards․ Review manufacturer instructions for maintenance and replacement schedules․ Ensure manuals are provided for future reference․ Ensure all detectors are functioning properly before final sign-off․
6․2 Fire Extinguishers and Emergency Exits
Ensure fire extinguishers are present on every level of the home and in key areas like the kitchen․ Verify that extinguishers are inspected recently and have valid inspection tags․ Check that emergency exits are clear of obstructions and properly marked․ Test all emergency exit doors to ensure they open smoothly and provide direct access to a safe escape route․ Confirm emergency exit signs are visible and illuminated, especially in low-light conditions․ Ensure stairways and hallways leading to exits are unobstructed and well-lit․ Verify that emergency exit routes are clearly defined and accessible, with no barriers or locked doors․ Confirm emergency exit signs are free from damage and functioning properly․ Ensure all emergency exits meet local building codes and safety standards․ This ensures quick evacuation in case of emergencies․
6․3 Safety Rails and Staircases
Inspect handrails and guardrails to ensure they are securely fastened and meet local building codes․ Verify that rails are at the correct height and made of durable materials․ Check staircases for even steps, consistent riser heights, and tread depths to prevent tripping․ Ensure nosing on each step is visible and securely attached․ Test handrails by applying moderate pressure to confirm they can support weight․ Inspect for any looseness or damage to rails, and ensure all bolts and screws are tightly secured․ Verify that staircases are free from obstructions and have proper lighting․ Check for any uneven surfaces or protruding edges that could pose a hazard․ Ensure all safety features comply with current building codes and safety standards․

Landscaping and Yard
Examine grading, drainage, and lawn health․ Check vegetation for proper planting and condition․ Inspect outdoor structures like patios, decks, and fences for quality and durability․
7․1 Grading and Drainage
Ensure the property’s grading is even and drains water away from the foundation․ Check for proper slope and elevation to prevent water pooling or erosion․ Verify that downspouts direct water at least 3-4 feet away from the house․ Inspect yard drainage systems, including gutters and storm drains, for functionality․ Look for signs of soil settling or uneven ground that could lead to water retention issues․ Ensure all exterior surfaces are clear of debris that might obstruct water flow․ Proper grading and drainage are critical to prevent structural damage and maintain a stable yard environment․ Address any concerns with the builder to avoid future issues․
7․2 Lawn and Vegetation
Inspect the lawn for even coverage, proper installation of sod or seed, and absence of weeds or debris․ Ensure the grass is healthy and evenly watered․ Check for any bare spots or uneven growth that may require attention․ Verify that vegetation is appropriately spaced and aligned with the property’s landscaping plan․ Look for signs of pests, disease, or poor soil quality․ Ensure irrigation systems are functional and properly programmed․ Check that all planted trees, shrubs, and flowers are healthy and securely rooted․ Address any issues with the builder to ensure the lawn and vegetation meet the agreed-upon standards․ Proper landscaping enhances curb appeal and creates a welcoming outdoor space․
7․3 Outdoor Structures and Features
Examine all outdoor structures like decks, patios, porches, and driveways for proper construction and materials․ Check if railings, stairs, and handrails are securely installed and meet safety standards․ Inspect outdoor lighting, ensuring all fixtures are functional and correctly positioned․ Verify that any built-in features like fire pits, grills, or outdoor kitchens are complete and operational․ Look for any signs of damage or poor workmanship․ Ensure that all outdoor structures are level and properly aligned with the surrounding landscape․ Check for any missing or loose components that need tightening․ Make note of any issues and discuss them with the builder to ensure all outdoor features are safe and ready for use․ Properly installed outdoor structures enhance both functionality and aesthetics of the property․

Documentation and Final Steps
Review warranties, manuals, and documentation provided by the builder․ Ensure all paperwork is complete and understood․ Address any punch list items requiring repairs or touch-ups․ Finalize the sign-off process to confirm the property is ready for occupancy, ensuring all deficiencies are noted and a plan for resolution is in place․
8․1 Reviewing Warranties and Manuals
Reviewing warranties and manuals is a critical step in the final documentation process․ Ensure all provided warranties are thoroughly understood, including coverage periods and terms․ Typically, new homes come with a one-year warranty on workmanship and materials, covering defects and necessary repairs․ Manuals for appliances, HVAC systems, and other fixtures should be collected and reviewed to understand proper operation and maintenance․ Organize all documentation in a secure, easily accessible location․ This step ensures homeowners are prepared to maintain their property effectively and address any issues promptly․ Understanding these documents is vital for preserving the home’s condition and ensuring warranty claims are handled efficiently․
8․2 Punch List for Repairs and Touch-Ups
A punch list is a detailed record of any repairs or touch-ups needed before final acceptance of the property․ During the walkthrough, document all defects, damages, or incomplete work․ This includes items like cracked tiles, paint imperfections, or malfunctioning fixtures․ Prioritize issues based on severity and ensure the builder acknowledges each item․ The punch list serves as a clear communication tool between the buyer and builder, outlining what needs to be addressed․ Once all items are resolved, the list is signed off, confirming the property meets agreed standards․ This step ensures no defects are overlooked, providing a smooth transition to homeownership․
8․3 Final Sign-Off and Completion
The final sign-off marks the official completion of the walkthrough process․ Once all issues from the punch list are resolved, both parties review the property to ensure satisfaction․ The buyer signs a completion certificate, confirming all repairs and touch-ups meet expectations․ This document is crucial for closing, as it releases the builder from further responsibilities․ The sign-off also transfers ownership formally, allowing the buyer to take possession․ Ensure all warranties and manuals are provided, and understand the maintenance responsibilities outlined․ This step finalizes the handover, ensuring a smooth transition and peace of mind for the homeowner․

Additional Considerations
Ensuring a new home is safe and well-maintained involves checking for pests, environmental hazards, and understanding ongoing maintenance responsibilities to prevent future issues and ensure longevity․
9․1 Maintenance Responsibilities
Understanding maintenance responsibilities is crucial for new homeowners to ensure the longevity and functionality of their property․ Regular inspections of HVAC systems, plumbing, and electrical components are essential to prevent issues․ Homeowners should also monitor for pest activity and address any signs of damage promptly․ Proper landscaping maintenance, including lawn care and drainage, is vital to avoid structural problems․ Familiarizing oneself with warranty coverage and scheduled maintenance requirements can prevent costly repairs; Additionally, keeping track of seasonal maintenance tasks, such as gutter cleaning and HVAC filter changes, ensures optimal performance․ This proactive approach helps maintain the home’s value and ensures a safe, comfortable living environment․
9․2 Pest and Pest Damage Inspection
A thorough pest inspection is vital to identify any potential infestations or damage in the new construction․ Look for signs of pests such as droppings, gnaw marks, or burrows in walls, floors, and wooden structures․ Check for termite activity, carpenter ant damage, or rodent infestations, which can weaken the property’s foundation and structural integrity․ Inspect areas around windows, doors, and vents for any gaps that could serve as entry points for pests․ Ensure that all wood elements, including trim and molding, show no signs of pest-related deterioration․ If damage is found, document it and discuss corrective actions with the builder to ensure the home is pest-free before finalizing the purchase․
9․3 Environmental and Health Concerns
Inspecting for environmental and health hazards is crucial during a new construction walk-through․ Check for mold growth, especially in damp areas like bathrooms and basements, and ensure proper ventilation․ Look for signs of asbestos or lead-based paint, which may require specialized removal․ Verify that all materials meet current environmental and safety standards․ Test for radon gas if applicable and ensure the property is free from hazardous chemicals․ Review systems for proper air quality and ensure no lingering fumes from construction materials․ Document any concerns and ensure they are addressed before finalizing the purchase․ This step protects both the occupants’ health and the property’s long-term integrity․


Leave a Comment